If you’re reading this article, you’re most likely stuck with the “Connection not private” issue in Chrome and have no idea what to do about it. If so, there’s no need to worry – this issue is easily fixable.

In this article, we’ll provide you with different solutions to bypass the problem quickly.
Chrome – Your Connection Is Not Private – What Does It Mean?
First of all, don’t panic – you weren’t hacked. This is one of the most common issues all Google Chrome users experience at some point. Receiving this warning simply means that Chrome wants to stop you from entering an unreliable website.
Basically, the website you’re trying to visit didn’t pass the SSL certificate test. Or Chrome simply isn’t able to verify it. SSL stands for Secure Socket Layer, and it’s an encryption system that helps protect your data from hackers. By entering your name or credit card information on a website without the SSL certificate, hackers have a higher chance of stealing your data.
Here’s a simple way to check whether a website is secure before entering it: If it has the certificate, it will say “https://” in the URL. Otherwise, the URL will start with “http://” – without the letter “s.”
Chrome – Your Connection Is Not Private – How to Bypass on a Windows, Mac, or Chromebook PC
Here are some of the most common solutions to the “Connection is not private” issue on Windows, Mac, or Chromebook PC:
Reload Your Page
As simple as it may sound, this method does the job more often than you think – reload the page with the error message. Sometimes, the SSL certificate is in the process of being reissued. Maybe your browser failed to send the request to the server. It takes take less than a second to apply this method, so you have nothing to lose.
Clear Browsing Data on Your Browser
Remove cookies, cache files, and similar. To do so in Chrome, follow these steps:
- Click on the three horizontal dots in the upper right-hand corner to open the menu.

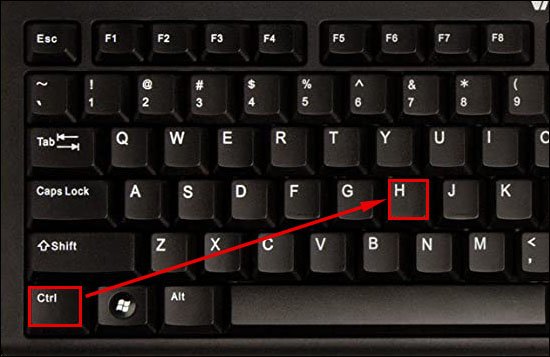
- Select the “History” section. Or simply open History by holding Ctrl + H (Command + H for Mac) on your keyboard.
- Select the “Clear Browsing Data” option from the left-side toolbar menu.

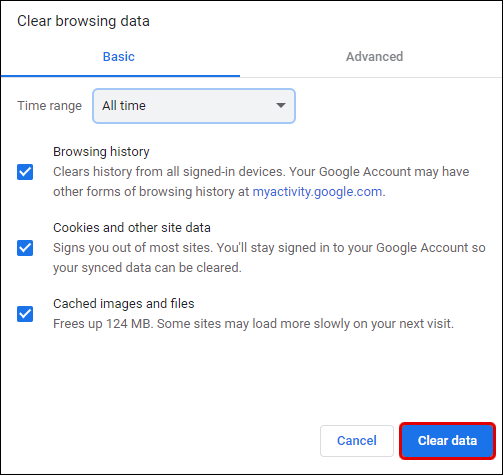
- We recommend ticking the boxes in the “Basic” tab as this will remove your cookies and cache. You can also go to “Advanced” to delete more data.

- In the “Time range” menu, choose the “All time” option.

- Click on the “Clear data” button to finish.
Make Sure the Date and Time Are Set to “Automatic”
In case your date and time are set incorrectly, there are higher chances you’ll get the “Connection not private” issue. Your browser will use your computer’s date and time to verify the SSL certificate. If something doesn’t match, there might be an issue.
Check Time and Date on Windows
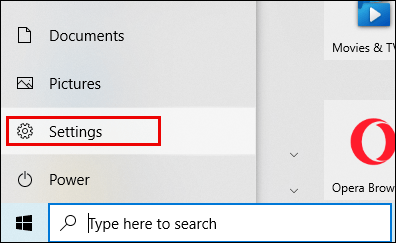
- Open your Settings in Windows. You can do so by clicking on the Windows logo in the bottom left-hand corner and then clicking on the Settings gear.
- Head over to the “Time and Language” section and further to “Date and Time.”
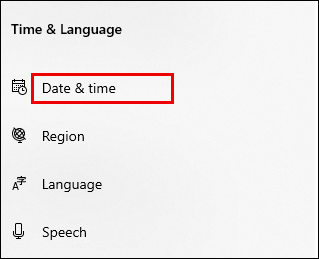
- Ensure the “Set time automatically” and “Set time zone automatically” are both enabled.

- Head over to the page you previously received an error message for and refresh it.
Check Time and Date on Mac
- Open the Apple menu by clicking on the Apple logo in the upper left-hand corner of the screen.

- Go to the System preferences.

- Open the “Date and Time” folder.

- Ensure the time zone is correct and the “Set date and time automatically” box is checked.
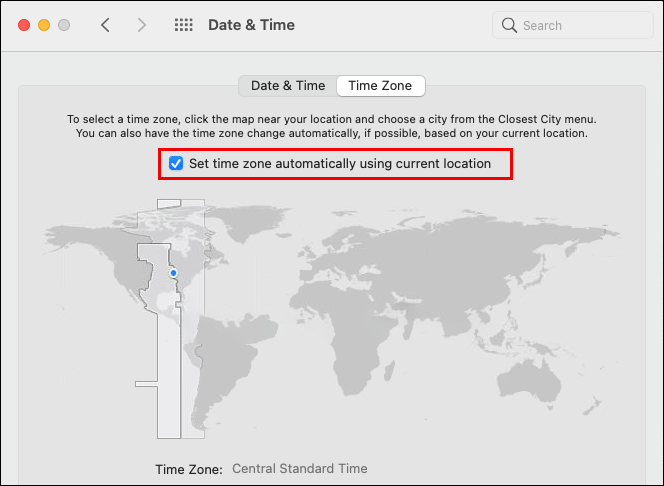
You might need to click on the yellow lock in the bottom left-hand corner of the window and enter your username and password to apply these changes.
Check Time and Data on Chromebook
- Click on the time on your Chromebook’s bottom right-hand corner.
- Select the “Settings” option.
- Go to the “Advanced” section.
- In the “Time Zone” section, select “Set automatically” and choose “Use Wi-Fi or mobile networks to determine location.”
Update Your Browser
Are you using an outdated version of Chrome? Make sure you install the latest version for everything to run smoothly.
Proceed to the Page Manually
Even if you get the message that your connection is not private, you can still proceed to that website – at your own risk. Simply click on the “Advanced” button from the bottom of the error window and select “Proceed to website.”
If you decide to do so, make sure you don’t leave any private information. The reason behind the initial issue might not be serious, but it’s important to minimize the risks.
Restart Your Computer and Router
Maybe there was a glitch in the system you can resolve by restarting your computer and router.
Disable Your Antivirus
You can either disable your antivirus altogether or partially turn off the SSL scanning feature. To test this method, simply disable your antivirus completely and try reloading the page in your browser. If the issue is gone, you’ll know your antivirus was causing the problem.
Sometimes, the antivirus can be overprotective, but you still shouldn’t leave any sensitive data on websites that don’t start with “https://.”
Don’t Use Public Networks
If you’re at an airport, café, or mall, you have a much higher chance of running into this issue. Public networks run on HTTP, so your transactions won’t be secured. Anyone using that Wi-Fi can steal your data with a couple of hacking tricks.
Disable the SSL Certificate Completely (Not Recommended – Unsafe)
Here’s an option we only recommend to the devs. If you’re just an ordinary internet user, you shouldn’t proceed.
This method will basically put the warning into silent mode – but the issue will still be there. Here’s how to do this on Windows:
- Find the Google Chrome icon on your desktop and right-click on it.

- Go to the “Properties” section.
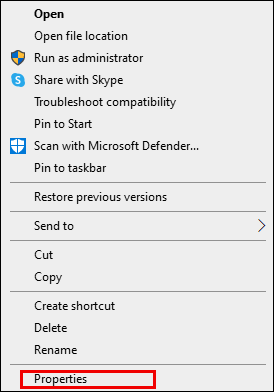
- Find the “Target” field and add the following line after quotation marks: -ignore-certificate-errors

- Click “OK” to save changes.

- In case an error code shows up, click the “Proceed” option to bypass.
- Head over to the website you previously got the warning for, and reenter it.
To disable the SSL certificate from your Mac, do the following:
- Go to your “Keychain Access” app.
- Find the certificate.
- Double-click on it, select “Trust,” and set it to “Always Trust.”
Chrome – Your Connection Is Not Private – How to Bypass on an Android device
You can apply a couple of methods to solve the “Connection Not Private” issue on your Android device. Start with the following:
Refresh the Page
This solution is most likely to solve your problem, and it’s the simplest method to try. If not, just keep applying the following methods until one of them works.
Check Your Time and Date
You might want to check that your phone’s time matches the web server’s time. Otherwise, the SSL certificate can’t get verified, which can result in an error message. Just do the following to make sure your time is automatically set:
- Go to the “Settings” page on your Android device.

- Scroll down and tap on the “Date and Time” section.

- Make sure the “Automatic Date and Time” button is toggled on. This will synchronize your device’s time with the time provided by your network.

Check Your Internet Connection
Maybe there’s a problem with your Wi-Fi or 4G. Try entering the website from another internet connection. If you manage to access it, you’ll know that the issue isn’t with the website itself. In this case, you might want to contact your internet provider.
Clear Your Browsing Data
To clear your browsing data in Chrome, do the following:
- Launch Chrome on your Android device.

- Open the Chrome menu by tapping on the three horizontal dots.

- Go to Settings > Advanced > Privacy.

- Select the “Clear Browsing Data” option.

- Choose “All time” and press “Clear Data.”

Disable Your Antivirus
To test whether your antivirus is causing the problem, try to disable it and reload the page. Regardless of the test outcome, turn the antivirus back on after you’re finished.
Open the Website in Incognito Mode
To check if the error only appears in a regular window, try running the website from a private one.
Manually Enter the Website
If none of the options above worked, you could enter the website manually by ignoring the warning. We certainly don’t recommend doing this, but if you do, don’t leave any sensitive information there.
When the warning window is displayed, just click on the “Advanced” option and then “Proceed to website.”
Chrome – Your Connection Is Not Private – How to Bypass on an iPhone
Here are some of the most common methods that help get around the “Connection Not Private” issue for iPhone users.
Refresh the Page
Most of the time, the solution lies in the simplest of forms – refreshing the page in this case. If this solution doesn’t work, apply the following methods until you find the right one.
Restart Your iPhone
Restarting your phone might help with potential glitches in the Chrome app.
Set Time and Date Correctly
If your device’s time is different from the time on the servers, it might result in a “Connection Not Secure” error. This is because the browser couldn’t verify the SSL Certificate as the time needs to match.
Here’s how to check if your time is set correctly:
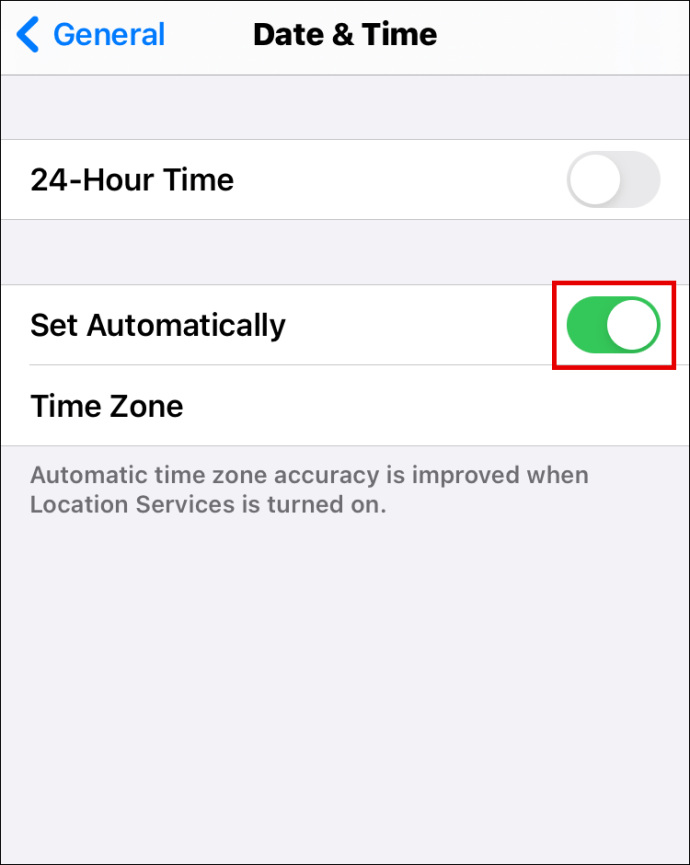
- Run the “Settings” app on your iPhone.

- Go to the “General” section and open the “Date and Time.”
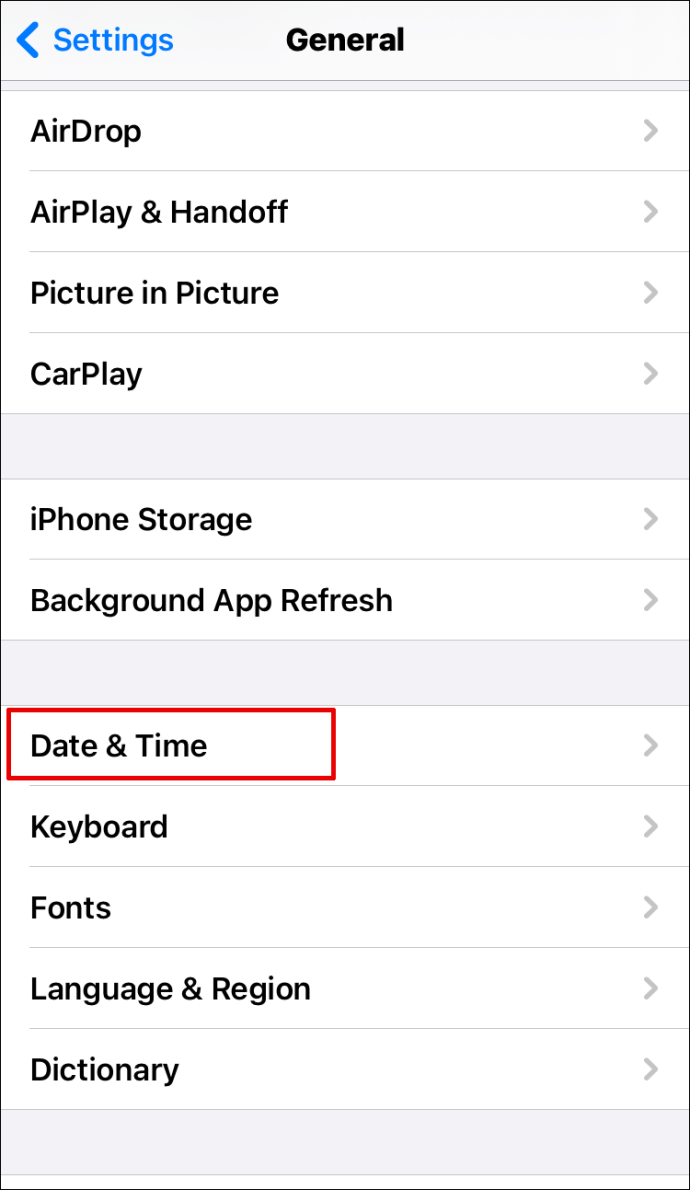
- Make sure you toggle the button next to “Set Automatically” so it’s on.
Clear Your Browsing Data
Maybe your cache got too full, and it’s messing with your browser. You can clear your data by applying these steps:
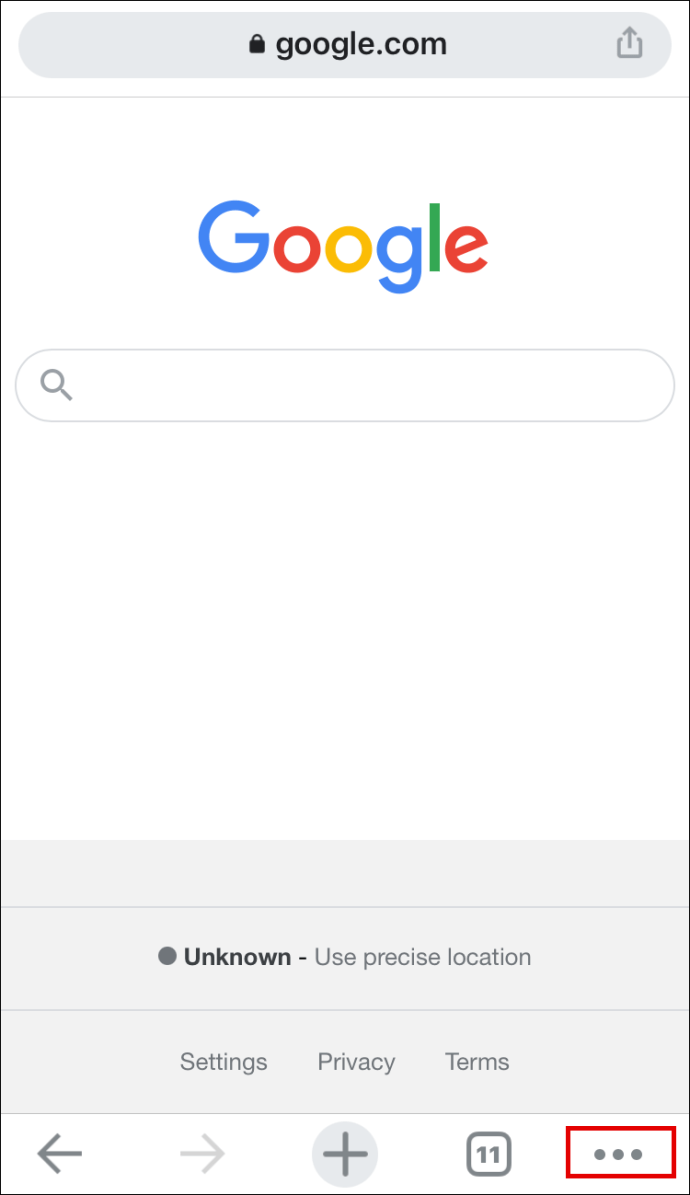
- Open Chrome on your iPhone.

- Open the menu by tapping on the three dots.
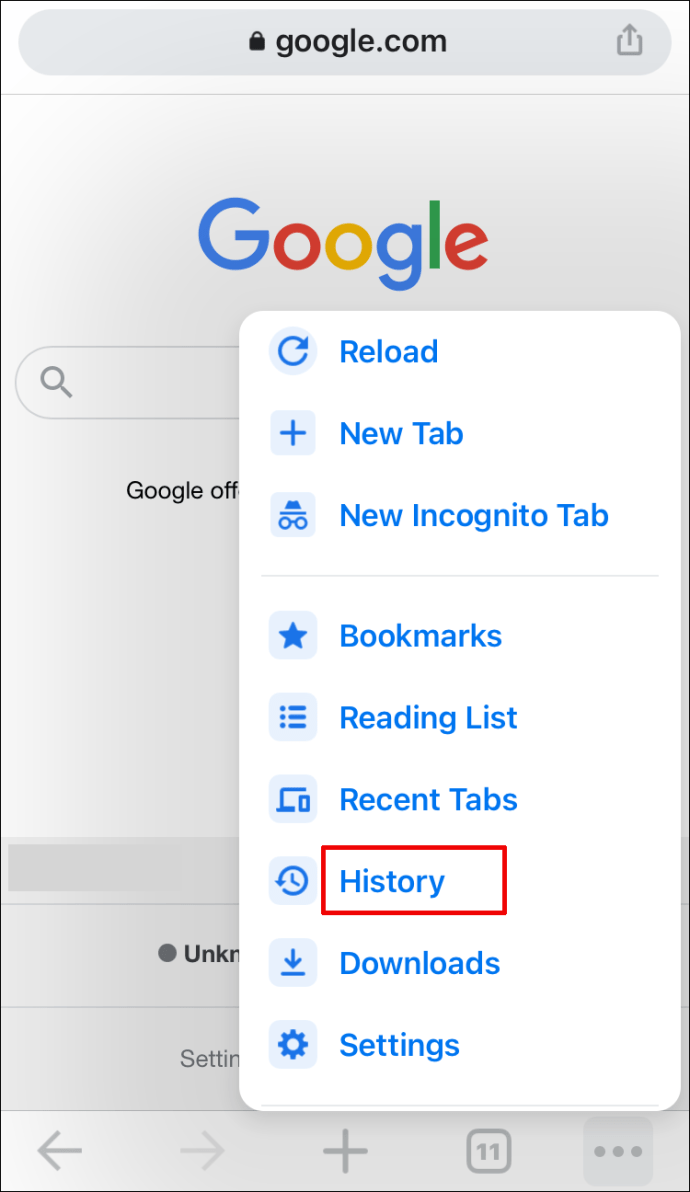
- Head over to the “History” section.
- Tap the “Clear browsing data” option from the bottom of the page.

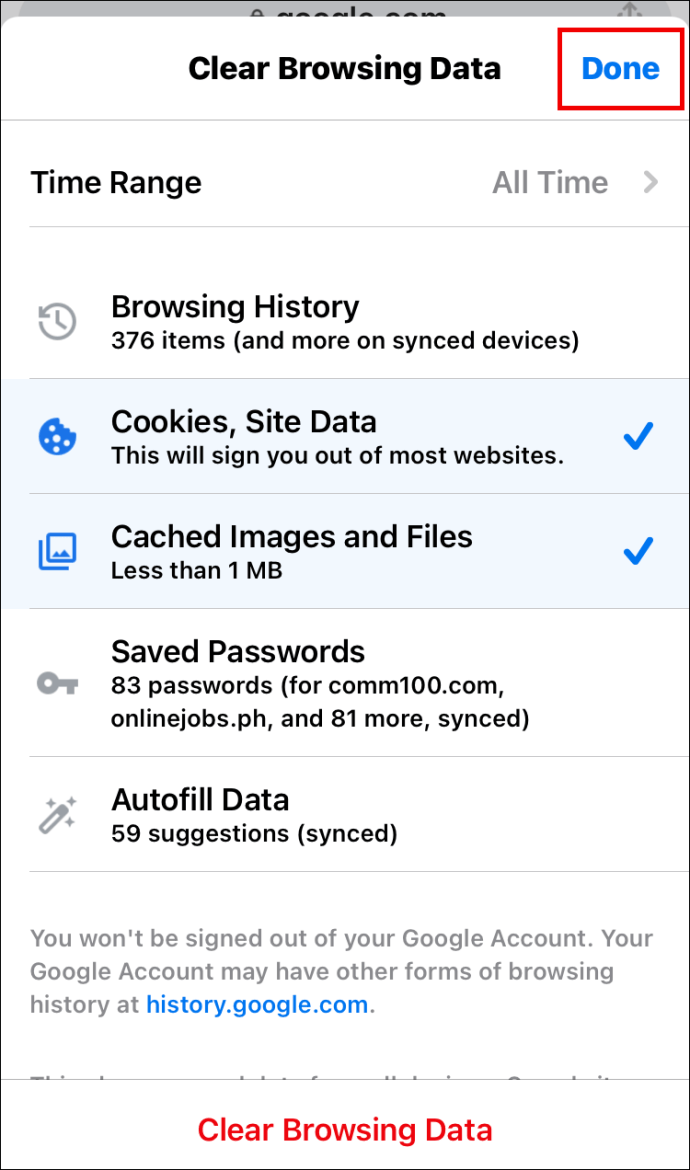
- You can choose what type of data you want to delete. Select cookies, site data, and cached images and files.

- Hit the “Clear browsing data” button.
- To confirm, tap “Clear browsing data” again.

- Tap on the “Done” button at the top right-hand corner to finish.
Disable Your Antivirus
To test whether your antivirus is causing the problem, try to disable it and reload the page. Regardless of the test outcome, turn the antivirus back on after you’re finished.
Enter the Page Manually
If you’re willing to take a risk (not recommended), you can ignore the warning and proceed to the page. However, you shouldn’t leave any sensitive information such as your name, address, or credit card number on the website.
Here’s how to proceed to the page manually:
- Before proceeding, please tap on “Show Details” and read everything in there.
- On the warning window, tap on the “Visit website” option.
- Tap “Visit Website” to confirm.
Solving the Connection Not Private Issue
As you now know, the “Connection Not Private” error is quite a common issue in Google Chrome – and it’s really not that big of a deal. To help you solve the riddle, we’ve provided you with the most common ways to deal with it. We always recommend starting from the most straightforward option – refreshing your page. If that doesn’t work, just keep applying the methods outlined above until you find the right one.
What method worked best for you? Do you know of any other ways to bypass this issue? Let us know in the comments section below.


0 comments:
Post a Comment