If you want to know how to delete Workspace in Asana, the short answer is – you can’t. Since it involves more than one user, the platform doesn’t allow you to completely remove it. However, there are ways to work around that.

In this article, we’ll explain how to deactivate Workspace in Asana without deleting it.
How to Create a New Workspace in Asana?
What exactly is a Workspace? When coordinating a group project, it’s best to create a shared space to store documents and exchange files. That space is called a Workspace.
What’s great about Asana is you don’t need a joint email domain to collaborate with people. Every participant can use their personal email for access. You can also become part of multiple Organizations with one account. However, you can only visit the ones you belong to due to privacy policies.
In turn, other members won’t be able to see your Workspace unless you send them an invite. Here’s how to create a new Workspace in Asana:
- To open “My Profile Settings,” click on your profile image.

- Open the “More Tab.”

- Choose to “Create New Workspace.”

After you’ve finished, you can start inviting collaborators to join you.
Once the project is completed, you probably won’t use that particular Workspace anymore. However, you can’t actually delete it from Asana. Instead, you have to take certain steps to deactivate it. Here’s how to do it:
- Remove all the tasks on the Workspace. You can do so by locating the tasks on the main pane and using the Tab + Backspace shortcut. You can also open the right pane and click on “Delete Task.”

- Deleting the projects. Open the drop-down menu by clicking on the small arrow icon next to the title. Choose “Delete Project.”

- Remove all team members. Go to Team Settings > Members. Select all members excluding yourself. Click “Remove.”
Once you’re done clearing all the data, you can now leave the Workspace. Here’s how:
- Open your profile and click on your photo.
- Go to “More.”
- Choose to “Remove me from this Workspace.”

Since there are no longer any Members or files, the Workspace is as good as deleted.
How to Limit Access to Members in Asana?
You can pretty much organize the entire space by using the Admin Console. As the creator, you’ll be the first to send out invitations to other members. Here’s how to do it:
- Open the “Members Tab.”
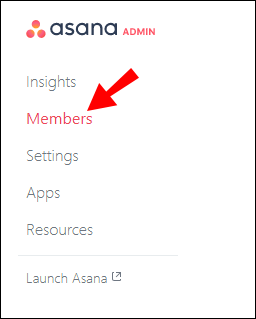
- Find the “Invite members” button and click on it.

- Type in the email address of your collaborator.
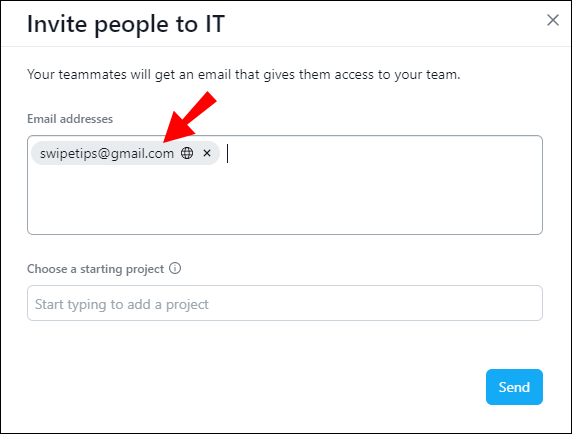
- From the drop-down menu, select the project you want to share with them.
- Click “Send.”

In case you accidentally sent an invite to the wrong person, it’s not irreversible. Here’s how you can cancel an invitation:
- Open “Member.”
- Locate the invitation you wish to revoke.
- Click on the three little dots next to the email address.
- Click on “Cancel invitation.”
The Admin Console also allows you to determine which people have access to which projects or tasks. Based on the level of clearance, there are two types of members. Workspace Members have unlimited access and are able to send invitations, customize the Workspace, and more.
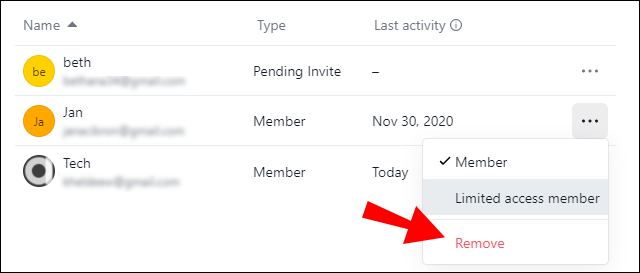
When you make someone into a Limited Access Member, you’re allowing them to create and edit projects and invite other Limited Members. However, they can’t make any changes to the Workspace, nor switch other people’s memberships. Here’s how to limit access to Members in Asana:
- Using the Admin Console, open the “Members” tab.
- Find the person whose membership you want to convert.

- Click on the three little dots on the right-hand side.

- Choose “Limited Access Member.”

Workspace Members and Admins can also remove people from the Workspace, while Limited Access Members can’t. This is helpful, in case you accidentally added the wrong person to the project. Here’s how to do it:
- Go to Team Settings > Members.
- Find the person’s name on the Members list.
- Select “Remove.”
How to Import Tasks Into Asana?
There are several work management tools that help you transfer your workload to Asana. You can move any data from spreadsheet programs such as Excel and Smartsheet.
If want to learn how to import tasks into Asana, you have to download the CVS Importer first. You’ll be able to import the task name and description, but also the due date and start date, collaborators, custom fields, and more.
Here’s how to import tasks into Asana by using the CVS Importer:
- Login to your Asana account.

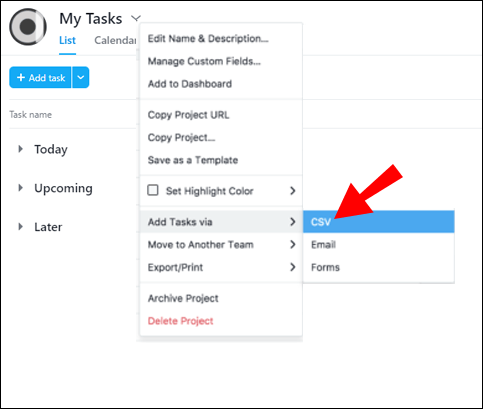
- Find the + button on the menu bar above. Click to start a new project.

- Choose “Add Task via” from the drop-down menu, then click on “CSV.”
- Use your mouse to drag the file to the importer.

- Depending on whether or not your spreadsheet has a header row, click on “Use first row as column names.”
- Fill in the information in the “Map Columns” window.

- Click on the button in the lower-left corner to start importing.
Before importing the task, you can make some formatting changes to your data entries. If you map your spreadsheet to Asana, everything will run smoother. Here are some tips on how to name the columns to automatically map them in Asana:
- You can add an assignee to individual tasks. Use their email address to map them successfully.
- Separate the start date and due date into two columns. To track them in Asana, you have to use the month/day/year format.
- Create detailed custom fields, if you own Asana Premium. Use the sections to determine your priorities.
- Set milestones to help you monitor the project’s development.
How to Cancel Asana?
If you’ve moved on to a different project manager, you can cancel your Asana subscription at any time. This goes for both free users and Billing Owners. Billing Owners also retain access to all purchased features until the renewal date arrives. Once you cancel your subscription, you can no longer use any tool.
As a Billing Owner, you can also cancel individual paid plans at any time. For example, here’s how to cancel a Premium Workspace:
- Open the Admin Console.
- Go to the “Billing Tab.”
- Click on “Edit Plan.”
- Choose to cancel.
You can make all sorts of changes to your subscription via the “Billing tab.” Apart from switching to a new paid plan, you can also transfer the Ownership to a different Member. Remember, only Workspace Members can be Billing Owners. Members with limited access aren’t allowed to influence paid plans.
Asana also has a 30-day trial period. The cancellation policy is the same, meaning you can end the trial at any given moment. Here’s how to cancel Asana during a free trial:
- Go to the Admin Console.
- Open the “Billing Tab.”
- Click on “Cancel Trial” to end your free subscription.
Additional FAQs
1. How Do I Delete Asana?
Free trial periods are a great way to determine whether something works for you. If it turns out Asana isn’t to your liking, after all, you can deactivate your account. Here’s how to do it:
1. Log in to your account and go to “Profile Settings.”
2. Open the “Account tab.”
3. Choose the option to “Deactivate Account.”
Remember this action is irreversible. Once you choose to deactivate, you lose all the data from that account. If you change your mind about Asana, you have to sign in all over again.
If you were a member of an Organization or Workspace, you don’t have to worry about disrupting a project. All the tasks will remain intact even if you delete your account.
2. How Do You Delete a Workspace on Huddle?
Naturally, Asana isn’t the only software for working remotely. Huddle is another solution for project management that offers similar collaborative tools. You can use it on both iOS and Android devices and it offers a monthly subscription.
Like in Asana, you can share your files by creating a Workspace for your team. Members can then customize the Workspace to their liking and invite more people to join. Here’s how to create a new Workspace on Huddle:
1. Log in to your account and open the dashboard.
2. Find the “Create New Workspace” button and click on it.
3. Choose an account for the Workspace and click “Next.”
You can start sending invitations after you’ve completed the steps.
Unlike Asana, Huddle allows you to delete the shared space after you’ve finished the project. However, only Account Admins have permission to do so. Here’s how to delete a Workspace on Huddle:
1. Go to your profile. Click on the arrow in the top right corner to open a drop-down menu.
2. Go to Account Settings > Workspace.
3. Find the Workspace you want to delete. Select “Delete” from the list of actions.
4. Confirm.
Once you’ve deleted a Workspace in Huddle, you can’t undo it. Make sure all tasks are completed before you decide to remove a Workspace.
An Honest Day’s Work
Working remotely has never been easier, thanks to a wide range of project management software. Asana is definitely at the top of the list when it comes to collaborative tools and a user-friendly interface.
Creating a Workspace is a great way to organize, especially when it comes to larger projects. Even though you can’t literally delete it once the job is done, Asana provides an option to deactivate it.
Do you use Asana or any other work management software? Do you find Workspace practical or is it a hindrance? Comment below and share your experiences with remote collaborations.
Original page link
Best Cool Tech Gadgets
Top favorite technology gadgets


0 comments:
Post a Comment