Smartsheet is a highly customizable collaboration tool that’s adaptable for virtually any task your business can throw at it. On the surface, it looks like just another spreadsheet app, but it’s also so much more.

With all these customization options, you’re bound to have a few questions about customizability, especially when it comes to Primary Columns. While some aspects of these columns are permanent once you set them, there are other ways to work around the issue to get it working the way you need it to.
Keep reading to discover tips and tricks you may not know about customizing the Primary Column in Smartsheet.
Is There a Hidden Way to Change the Primary Column in Smartsheet?
Unfortunately, once you set the Primary Column in Smartsheet, you can’t change it – hidden or otherwise. However, there are a variety of workarounds that may help you make changes to the Primary Column instead of re-designating the column itself.
Alternative #1 – Changing Content
If the content in the Primary Column is the issue and you’d like to trade data from one column to another, you can change it using these steps:
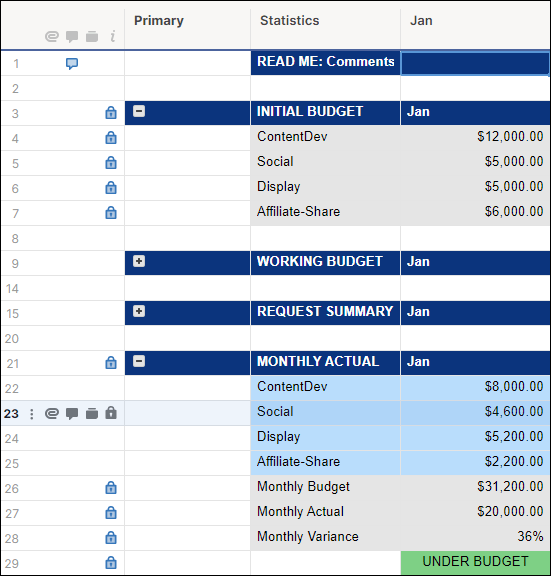
- Choose a column close to the Primary Column and select the arrow in the column header to open the drop-down menu.

- Click “Insert Column Right” or “Insert Column Left.”

- Name the new column.

- Cut and paste the data from the Primary Column to the new column.

- Cut and paste the data you’d like instead in the now-empty Primary Column.
You can also use the “temporary column” workaround. It won’t change your designated Primary Column, but it’s a way to move data around on a sheet that’s already developed and populated. The steps are similar to the ones above except that you create an extra temporary column to help shift data around. The process looks like this:
- Create a temporary column anywhere on the sheet.
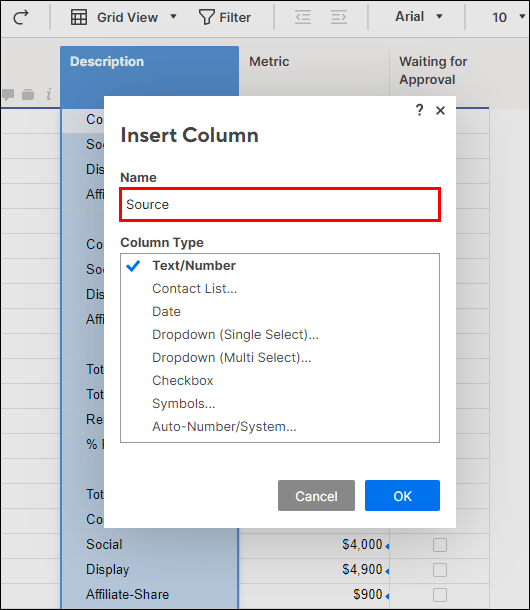
- Copy and paste the data from your Primary Column to the newly created column.
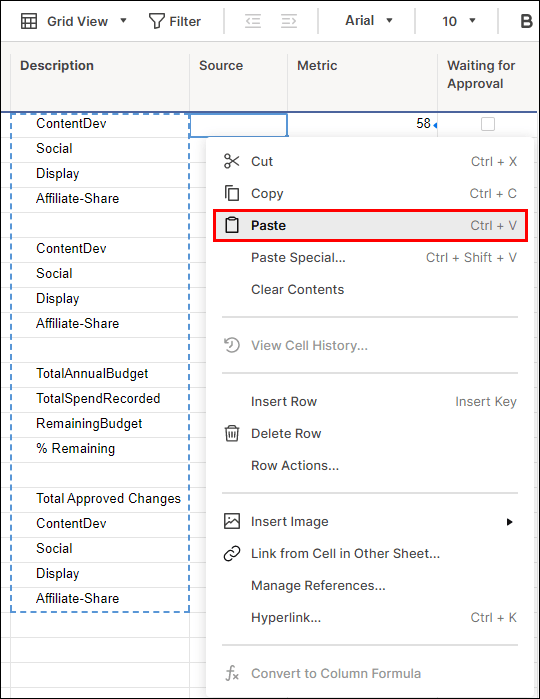
- Copy and paste the data from the column you wanted to make your Primary Column into the now blank Primary Column space.

- Delete the temporary column from the sheet.
- Re-name your new Primary Column and the column where you retrieved the primary data.

Renaming the Primary Column is a simple process. Simply double-click on the column name so the cursor appears in the text box and type the new name. Just remember to try to use descriptive names for the Primary Column to help keep things straight when collaborating with other users.
Alternative #2 – Hiding the Primary Column
Hiding the Primary Column is also an option, especially if you don’t plan on using hierarchies in the sheet. Simply leave it blank and then hide it. Check out the steps below to hide a column from view:
- Hover the cursor icon over the name of the column you want to hide.
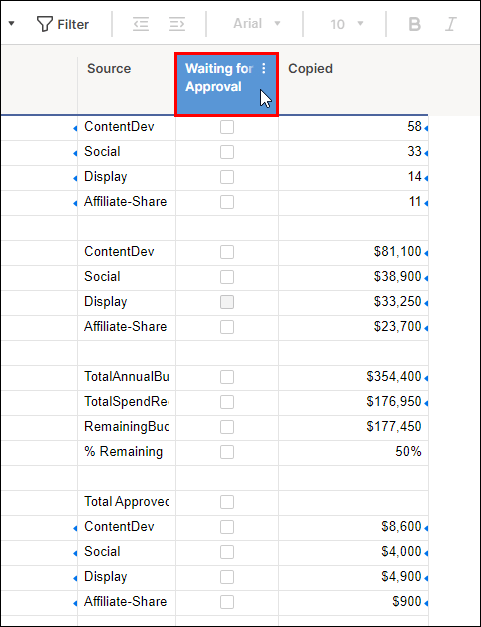
- Choose the three stacked horizontal dot icon for “More.”

- Scroll down and select “Hide Column” from the drop-down menu.

- To view the hidden column again, click on the double bar that represents the hidden column in the column header and drag it open.

Keep in mind that only licensed collaborators with Admin access and sheet owners can access this feature to hide columns from view. Anyone with “Viewer” or “Editor” access cannot unhide the column using Smartsheet. However, this feature may be bypassed if these collaborators export the Smartsheet to Excel and unhide the columns using the Microsoft program.
Additionally, you can designate a Primary Column yourself when you create a new sheet and import the data from somewhere else. Unfortunately, this is the only way you can set the Primary Column yourself. If you choose to create a new Smartsheet, the app creates the Primary Column and sets it automatically.
Copy/Paste the Contents of the Primary Column to Another Column
Unfortunately, Smartsheet does not support copy and paste functions for columns, but you can copy and paste rows and cells. It may take a little longer, but this is the only workaround currently available for the app.
Follow these steps to copy and paste cells within or between Sheets:
- Highlight the cells you’d like to clone.

- Right-click on your mouse, scrolls down, and select “Copy” or use keyboard shortcuts (Ctrl + C on Windows, Command +C on a Mac).
- Go to the cell where you’d like to copy the information and single-click on it.

- Paste by using the drop-down menu when you right-click on your mouse or keyboard shortcuts.

Copying and pasting rows work a little differently, but if you’re familiar with Excel spreadsheets, this process should also be familiar to you. For a refresher, take a look below:
- Copy the row by highlighting the row number and using the “Copy” drop-down menu selection or keyboard shortcuts.

If you’d like to copy multiple consecutive rows, click the top row’s number first. Next, hold down the ‘’Shift’’ button and select the bottom row number to highlight all the rows in between.

- Paste the copied rows by clicking on the rows number and then the arrow next to it.
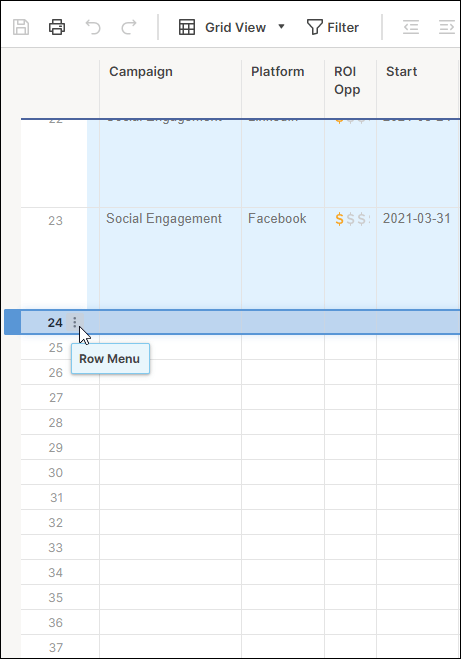
- Scroll down the menu and select “Paste Row.”
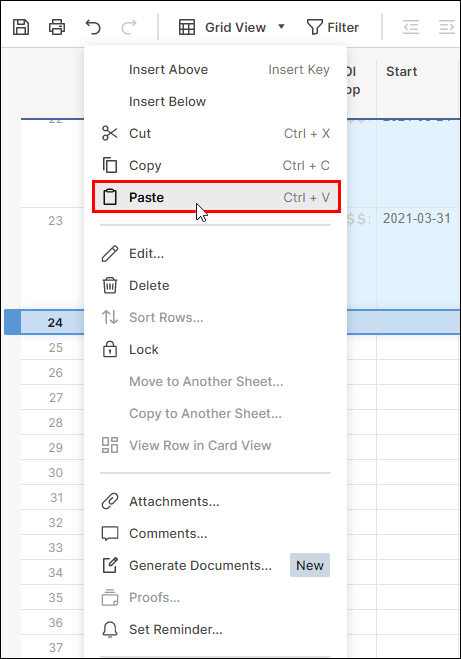
Keep in mind that any discussions or attachments related to the row data are not copied or pasted into the new rows. You can preserve discussions or attachments when you copy rows, but you’d need to copy the data onto a different sheet.
If you need to copy data from your Primary Column to another sheet, this is how you do it:
- Select and copy all of the rows you’d like to clone from the Primary Column.

- Hover the cursor over the highlighted area and right-click on it.

- Select “Copy to Another Sheet” from the drop-down menu.

- Find the destination sheet in the sheet picker window.
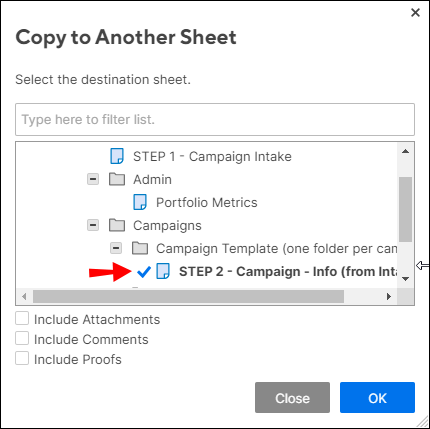
- (Optional) Select the checkboxes to “Include Comments” and/or “Include Attachments.”

- Select the “OK” button.
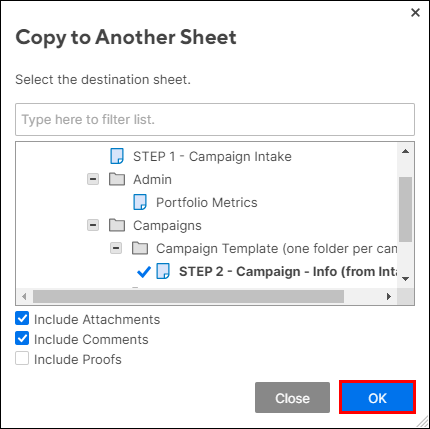
When you copy data from one sheet to another, the rows appear at the bottom of the destination sheet. The feature doesn’t automatically populate columns, but you can create a new column in the destination sheet and use the copy and paste method to populate it with data.
Copy a Column and Paste It Into the Primary Column
Smartsheet does not currently support copy and paste functions for columns, primary or otherwise. However, you can still move data from one column to another by copying cells or rows. It may seem a little more tedious, but it’s the only workaround available at the moment.
To copy a group of cells into the Primary Column, take a look at the steps below:
- Highlight the cells you’d like to copy.

- Use the right-mouse “Copy” function or keyboard shortcuts to copy the cells to the clipboard.

- Click on the cells you’d like to paste the new data to in the Primary Column.

- Right-click and choose the “Paste” option in the drop-down menu or use keyboard shortcuts to paste the new data.

You can also use Alternative #1 mentioned above to change the content of the Primary Column. The steps are as follows:
- Create a new column.

- Copy and paste “old” data from the Primary Column into the newly created column, making the Primary Column free of content.
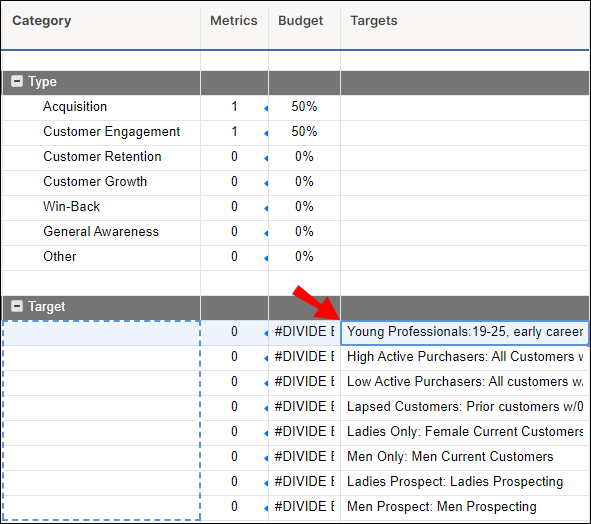
- Copy and paste new data from the existing column where you initially wanted to switch out data from into the Primary Column.

- Delete the newly created column with the “old” Primary Column data or rename it.
Just keep in mind that it may take a while to copy and paste data from column to column because Smartsheet does not support this feature. They may update the app in the future to include a column copy and paste function, but for now, you’ll have to do it by cells or by rows.
Rename the Primary Column and the One You Want as Primary
You cannot change the Primary Column designation once the app sets it as “Primary” in a new sheet. The first column in the sheet will always be the “Primary” one and you can’t switch it out for another column. However, if you simply wanted to rename your columns, you just need to double-click on the column name header and rename the column in the text box.
Hide the Primary Column
Hiding the Primary Column is a simple process.
- Hover the mouse icon over the column name.

- Select the “More” icon to open the drop-down menu.

- Choose “Hide Column” from the menu.
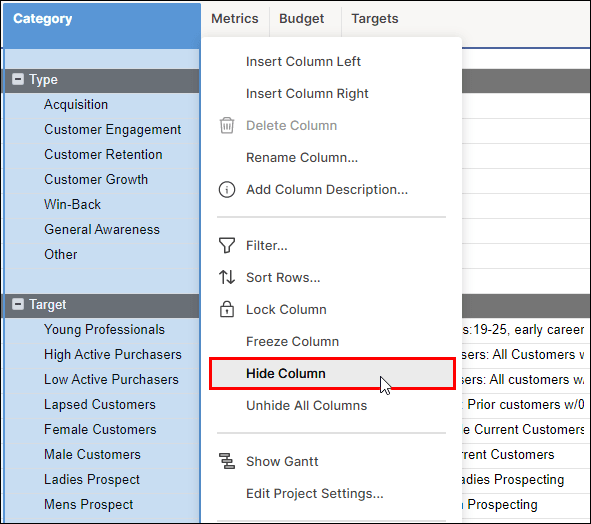
You can only hide or unhide columns if you’re the owner of the sheet and/or have admin access.
Smartsheet Primary Column FAQs
Can I Hide the Primary Column in a Grouped Report?
You can try configuring the report using the tabs in the upper toolbar after using the Report Builder. Configuration options for reports include:
• Filter Criteria
• Group
• Columns to Display
• Source Sheets
Unfortunately, hidden columns may still appear in reports when you use functions like the Send, Edit, or Print dialogue boxes, regardless of whether the “include hidden columns” box is selected or not. It has to do with the way that Smartsheet designed reports to draw data. It collects data from each row in the sheet, not each column. Consequently, it can show everything in the sheet including columns you have hidden or filtered out.
Does the Primary Column Have to Be a Text/Number Field?
Yes, Primary Columns are always Text/Number types. These properties can’t be altered or changed because it’s a part of the app design.
Primary Workarounds
Smartsheet may not have the versatility that you need, but that doesn’t mean that you can’t use a workaround to get what you need from the app. Feel free to use these alternative methods to insert new content into the Primary Column or hide that first column completely if it doesn’t suit your needs.
Just remember that many of these actions can only be done by licensed users with Admin privileges or by owners of the sheet in question.
Are Primary Columns integral to the way that you use Smartsheets? How often do you change or hide the Primary Column? Tell us about it in the comments section below.
Original page link
Best Cool Tech Gadgets
Top favorite technology gadgets


0 comments:
Post a Comment