Time Machine is a built-in feature that regularly backs up your data. That includes photos, videos, apps, documents, and even emails. If you ever need to reinstall a macOS, you don’t have to worry about losing important files. You can pretty much restore the entire computer by using the Time Machine app.

However, since the program is so thorough, the backup files can quickly overload your external drive. You might want to free up some of that space and switch to doing manual backups. In this article, we’ll show you how to turn off Time Machine by using the app or a nifty Terminal command.
Option 1: Turn Off All Backups Using the Time Machine App
For starters, you can try turning off Time Machine by using the app. That way, it’ll automatically stop backing up your files, but you’ll still be able to do it manually. It’s pretty straightforward and only requires a few simple steps:
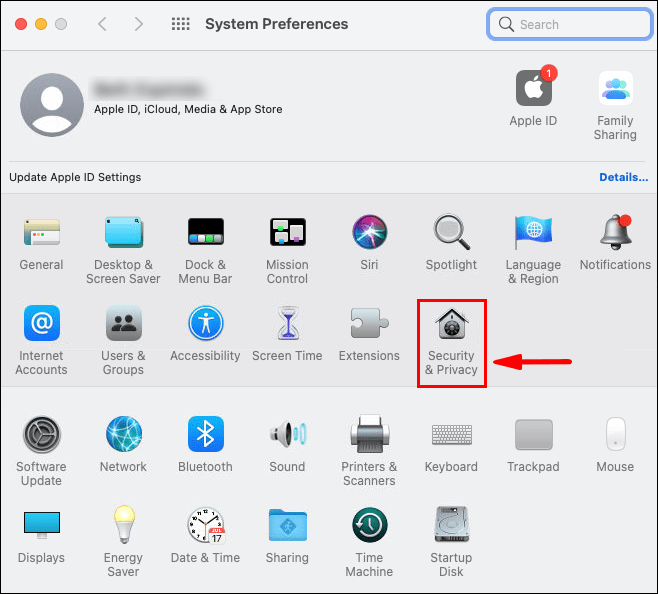
- Open “System Preferences” on your Mac. Move your cursor to the top-left corner of the screen and click on the Apple icon. Then choose “System Preferences” from the drop-down list. You can also use the Dock and click the “System Preferences” icon.

- Find the Time Machine icon at the bottom of the window. Double-click to launch the app.

- A new window will appear. Turn off Time Machine by clicking on the big slider on the left-hand side.
After turning it off, Time Machine will no longer automatically back up your files. However, you won’t free up any space on your external drive this way. You have to do it manually by deleting the files within the app. Here’s how:
- Navigate to the Menu bar and click the Time Machine icon. If it’s not there, click on the Apple icon and go to “System Preferences.”

- Browse through the categories in the panel on the left-hand side. Time Machine separates the backup files by format (e.g., Pictures, Applications). Click on the folder containing the files you want to delete.
- Select by dragging the cursor across the files you want to remove. Click on the little gear icon in the menu bar above.
- Choose “Delete All Backups of _ Items” from the drop-down list.
You can also use Finder to delete old backup files:
- Open Finder by clicking on the icon in the bottom-left corner of the Dock.

- Select the folder with the Time Machine backups from the left sidebar. It can be an external hard drive or a memory card, depending on what you used as a backup disk.
- Double-click on the “Backup.backupdb” folder to access the files. They’re sorted by the date of creation, from oldest to newest.
- Select the files and click on them while holding CMND to open the options window. You can also do it by tapping the touchpad with two fingers.
- Select “Move to Trash” from the list of options.
- Go back to the Dock and open the Trash Can folder. Use the ‘’CTRL + click’’ command to view the options. If you want to permanently delete the files, choose “Empty Trash Can.” If you want to go over them once again, click “Open.”
Option 2: Use the Terminal to Turn Off Time Machine Backups
As you can see, the Time Machine interface is pretty straightforward. You can turn the app off with ease and even delete unnecessary backup files to free up storage space. But what happens if you’re working on a remote Mac or want to run some scripts?
The Terminal app is the built-in command-line tool for Apple devices. You can locate it in the Applications folder in Finder or by using Spotlight Search. Apart from the standard commands, you can also use Terminal to disable Time Machine backups. It’s a little trickier than the previous method, so make sure you follow the steps carefully:
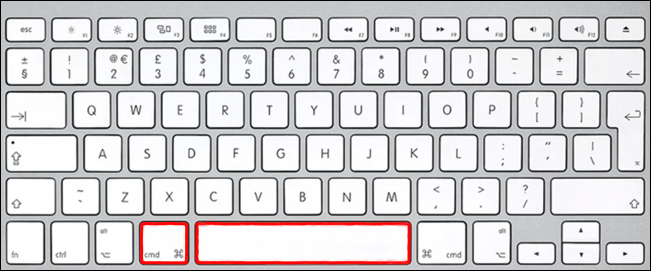
- Press ‘’CMD + space’’ to open the Spotlight menu.

- Type “Terminal” into the dialog box and press “Enter.” After entering the first few letters, Spotlight will provide a list of search results. You can select the app from there as well.

- Clear the space and type “sudo tmutil disable.” Make sure your external drive is plugged in before you enter the command.
Since the tmutil command requires administrative privileges, you’ll have to use the sudo command as well. You’ll probably be asked to enter a password after running the command, so don’t be surprised.
If you just want to stop a particular Time Machine backup, you can also use Terminal:
- Hit ‘’CMD + space.’’

- Type “Terminal” and hit “Enter.”

- Delete the text and type
tmutil stopbackup.
There’s also a command-line that lets you exclude particular folders from Time Machine backups:
- Press ‘’CMND + space.’’

- Open Terminal and enter
sudo tmutil addexclusion. - Add the name of the folder after the command. Just make sure to use “~ /” as a prefix. For example, if you don’t want Time Machine to back up downloaded files, type:
sudo tmutil addexclusion ~/Downloads.
It’s safe to say you can use Terminal to complete pretty much all backup-related tasks. Here are some more Time Machine commands that can come in handy:
- To access a list of all backups, use:
tmutil listbackups. - To see where the backups are stored in a remote computer, use:
tmutil destinationinfo. - To start a backup, use:
tmutil startbackup - To delete old files, use:
sudo rm –rf ~/.Trash/.
If the last command doesn’t work, it might be because Terminal doesn’t have full access to the external drive. You’ll have to temporarily permit it to finish the process:
- Click on the Apple icon in the upper-left corner of the screen.

- Select “System Preferences” from the drop-down list.

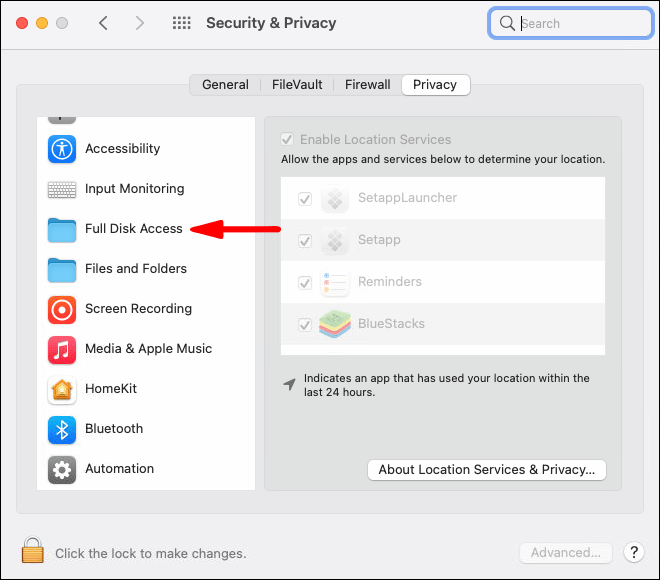
- Go to “Security and Privacy” and open the “Privacy” tab.

- From the panel on the left-hand side, choose “Full Disk Access.”

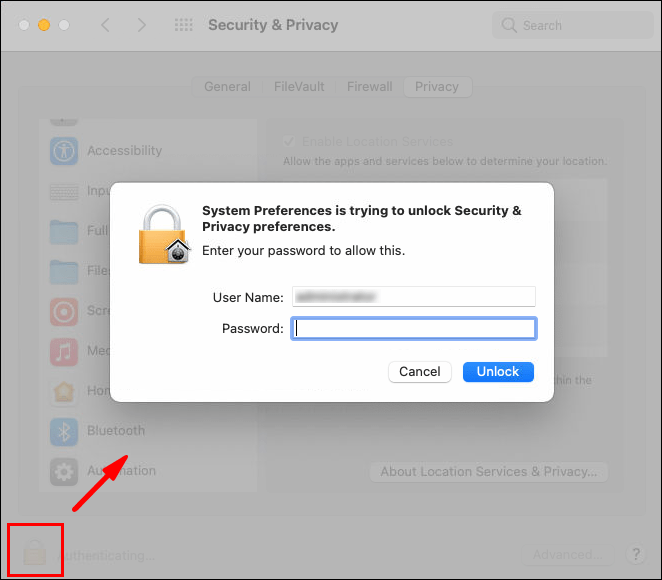
- Tap the lock icon in the bottom-left corner. Enter your Touch ID in the pop-up window.

- Click the small “+” button to add the Terminal app.

Time Machine Backup FAQs
Is There a Difference Between Disabling and Turning Off Time Machine?
Apart from the semantics, there’s not much difference between turning off and disabling Time Machine. The distinction lies in the method, meaning whether you use the app or a Terminal command to prevent automatic backups.
Most users gravitate toward the first option since it’s more straightforward. Although there’s nothing inherently unsafe about using command lines, it is slightly more demanding.
Either way, you’re left with the option to manually back up your files. All you need is an external or USB drive with ample storage space, and you’re good to go. Just follow these simple steps:
1. Open Finder and select “Preferences.”
2. Scroll to the “Hard Disks” section and check the little box to show the item on the desktop.
3. Create a new folder in the backup disk for the backup files.
4. Open the local computer disk and select the “Users” folder.
5. Drag your cursor over the files you want to back up and move them to the external drive folder.
6. Wait a few seconds until the process is complete. The time may vary depending on the size and amount of files.
How Do You Delete Time Machine Snapshots to Save Space?
Snapshots are there because Time Machine isn’t always connected to the main backup disk. Since the app uses external drives or flash memory cards to store files, they’re not normally plugged in 24/7. When disconnected, Time Machine will make a list of pending backups by taking snapshots of particular files.
While this system is highly efficient, it’s also the main culprit for overrunning the storage space. Luckily, you can delete the snapshots from your computer by using a Terminal command. Here’s how:
1. Launch Terminal with the ‘’CMND + space’’ keyboard shortcut.
2. Enter the following command: tmutil listlocalsnapshots /. Make sure to hit space before the slash.
3. You’ll see a list of snapshots. Copy the info and clear the box.
4. Enter the ‘’sudo tmutil deletelocalsnapshots’’ command and add a particular date at the end.
You do have to repeat these steps for each snapshot, so it can get a little tedious. However, you can avoid snapshots altogether with a simple Terminal command:
1. Press ‘’command + space’’ to launch the Spotlight menu.
2. Enter: sudo tmutil disable local into the box.
3. Type your system administrator credentials in the pop-up box.
If you find all these commands too demanding, don’t worry. There are plenty of third-party apps for clearing out snapshots. We recommend downloading CleanMyMAc X from the Mac App Store. It’s one of the most popular cleaner tools for macOS, and it’s available for free.
Going Back on Backups With Time Machine
While Time Machine is a reliable tool, it may just be too reliable. No one can really cope with that amount of backup files and local snapshots. Luckily, you can simply disable the app and move on to doing manual backups.
There are two ways you can go about it. The preferred method for most is using the Time Machine app to turn off automatic backups and delete piled-up files. However, there’s a wide range of Terminal commands that can perform most, if not all, managing tasks. It boils down to personal preference, so feel free to try out both options.
How do you do your backups? What’s your experience with Terminal commands? Comment below and tell us if there’s another way to disable Time Machine.
Original page link
Best Cool Tech Gadgets
Top favorite technology gadgets


0 comments:
Post a Comment