Zoom has quickly become one of the most popular conference tools worldwide, allowing companies and groups to schedule and join meetings seamlessly. However, default Zoom recording capabilities leave a lot to be desired and usually suffer in quality as it tries to keep the live streaming side effective. That’s why many users turn to third-party recording programs to boost their recording quality and improve Zoom’s capabilities.

There are two main ways to use OBS with Zoom. The first one is to simply record everything that Zoom outputs and use the OBS’s superior resolution and sound quality to edit that recording for later use. However, OBS can also directly connect with Zoom to allow you to make real-time changes, add more sound channels, and even enhance live streaming Zoom conferences.
How To Recording a Zoom Meeting With OBS
If you want to record Zoom meetings and store them for later, you can achieve great results without any third-party tools. The only things you’ll need to install are OBS and Zoom. Here’s what you need to do:
- Launch Zoom and OBS.
- In OBS, under “Sources,” click the + icon and select “Display Capture.” This will work best if you have more than one monitor for your PC, but it will still function if you only have one.

You can use the “Window Capture” option and select “Zoom.exe” as your source, but this might not always work.

- Name the capture whatever you want, then click “OK.” You can use the name of the monitor you’re using for Zoom to keep it simple.

- Choose the monitor to display the video from the dropdown list. The preview will show the monitor’s current feed.
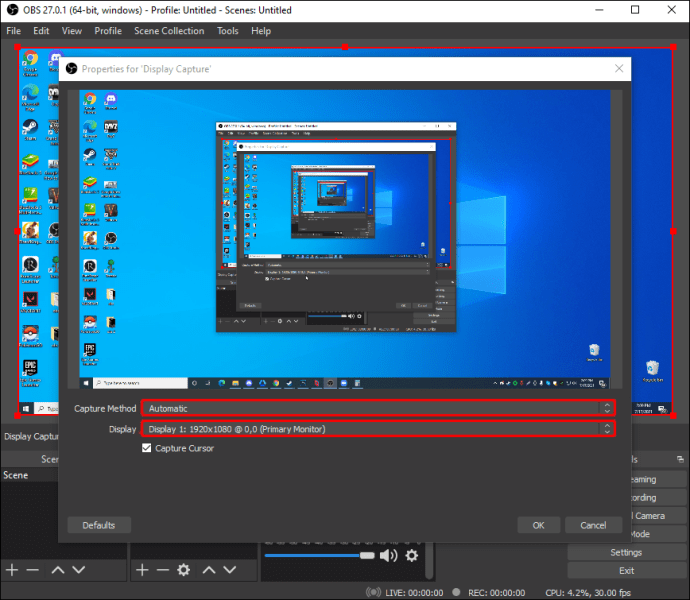
- Uncheck the “Capture Cursor” box.

- Click “OK” when you’re satisfied with the choice. Your OBS now has the current monitor feed on display. Typically, you’ll see cascading previews if OBS is also on that monitor.

Now you need to add the audio coming from you (the microphone) and the participants (the computer audio). - In OBS, click on “+” under “Sources” again, then choose “Audio Input Capture.”
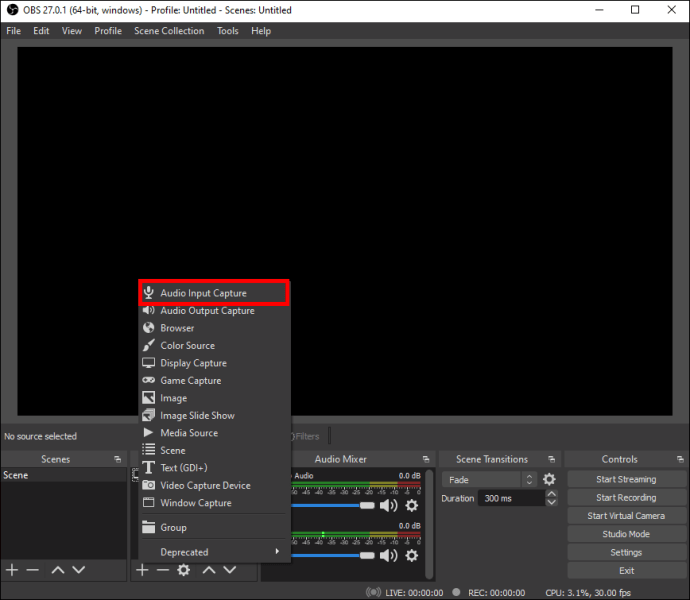
- Rename the capture source if you want to keep it separate from the other source and avoid confusion, then press “OK.”

- Select your input device from the dropdown list, then press OK. You’ll now see a new audio input in the “Audio Mixer” screen below the video preview showing you the capture from the microphone.

- Add another source (click on “+”). Select “Audio Output Capture.”
- Rename the source if you want, then select “OK.”
- Choose the output device from the list. To avoid doubling sounds, we recommend using headphones. Press “OK.” You’ll now see the second line in the “Audio Mixer” section.
- Press “Start Recording.” You can also use “Start Streaming” if you need to stream the conference elsewhere.

- Maximize Zoom to full-screen mode to make it the only visible program on display.
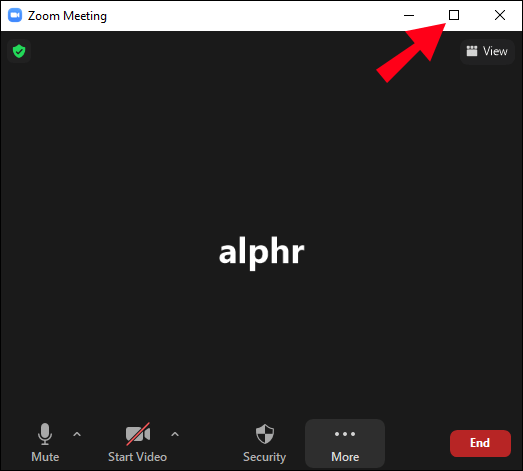
- When you’re done recording, return Zoom to windowed mode and select “Stop Recording.”
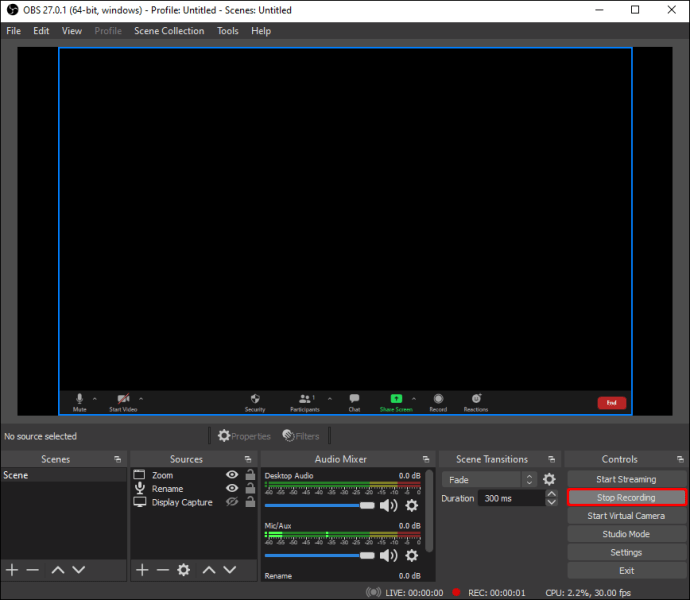
The video will have a short period when Zoom is not in full-screen, and the cascading preview will show if the OBS is on the same display. You can remove that in post-editing if needed.
The sound in the recording will be doubled if you’re using speakers because your mic will pick up the output sound from your device. Use headphones to avoid this.
Connecting OBS and Zoom
If you want more freedom in Zoom meetings and want to have OBS be the commanding program for your video and audio, you’ll need to connect them. For this, we recommend using the OBS VirtualCam plugin.
Here’s what you need to do:
- Download the OBS plugin. Follow the instructions in the installers.

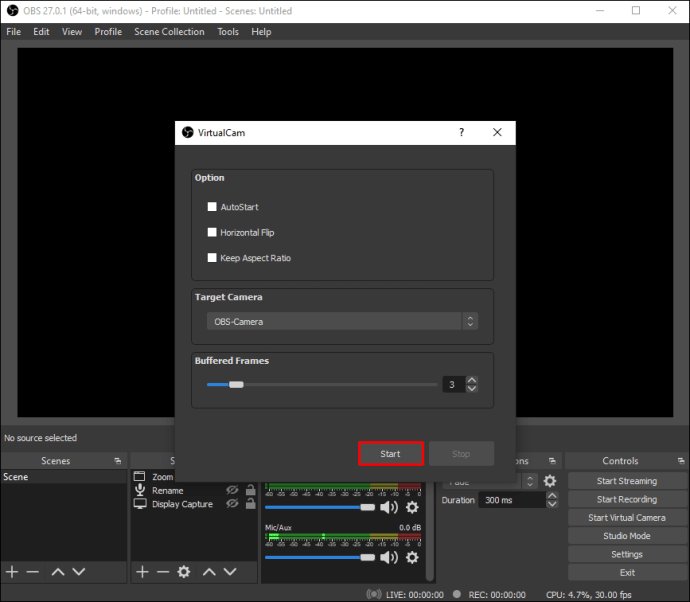
- In OBS Studio, go to “Tools” in the top bar. Select “VirtualCam.”

- Set the virtual camera to “OBS-Camera” and click “OK” to save the settings.

- Click on “Start Virtual Camera” in the bottom right (under “Controls”).
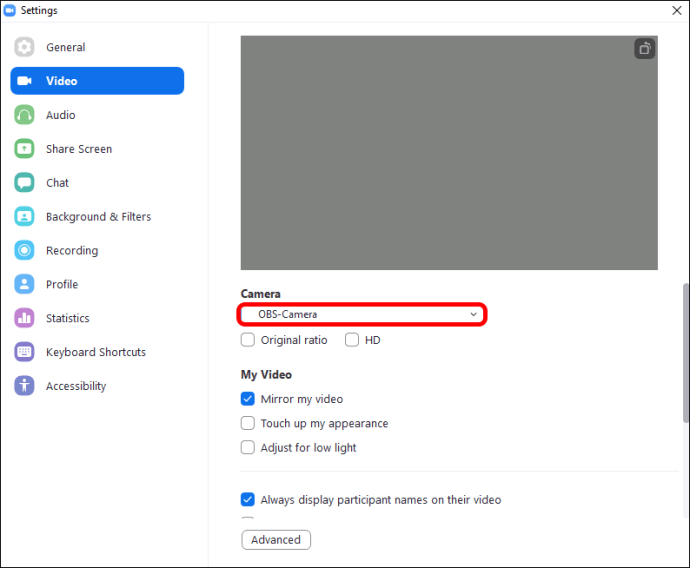
- In the Zoom app, select “Video Source” in the meeting or the general settings.

- Select “OBS-Camera” as your video source. If it doesn’t start showing the camera, select “Start Video.” Your video feed from OBS is now directly routed to Zoom, and every change or effect you make will show in Zoom.
Your OBS and Zoom are now connected, so every change in OBS will be reflected on Zoom.
Use “Window Capture” or “Display Capture” to start recording or streaming your Zoom meeting in OBS.
Higher Quality With OBS and Zoom Together
When using OBS to record and control your Zoom meetings, you can get higher-resolution video and audio. While Zoom is perfectly serviceable as a live meeting platform, the things you can do with OBS far outweigh the costs of setting up the system. Play around with the settings to get the results that work best for you.
How is your Zoom and OBS system set up? Let us know in the comment section below.
Original page link
Best Cool Tech Gadgets
Top favorite technology gadgets


0 comments:
Post a Comment