ClickUp is a project management and collaboration app designed for companies of all sizes. It comes with a bunch of handy features, such as communication tools, task assignments, and toolbars.

Another neat function is statuses, also known as workflows. For instance, your task can be marked as “To do,” “In progress,” or “Complete.” Each designation is a status, but how exactly do you add it to your workspace?
In this entry, we’ll go through the intricacies of adding statuses in ClickUp.
How to Add Statuses on ClickUp?
In ClickUp, you’re not limited to default statuses. You can also add new ones, regardless of the device. Let’s first take a look at how you can create statuses at the ‘’Space’’ level since lists and folders inherit them by default:
Mac
Adding statuses on your Mac is straightforward:
- Head to your “spaces” bar in the left section of the screen and expand it.
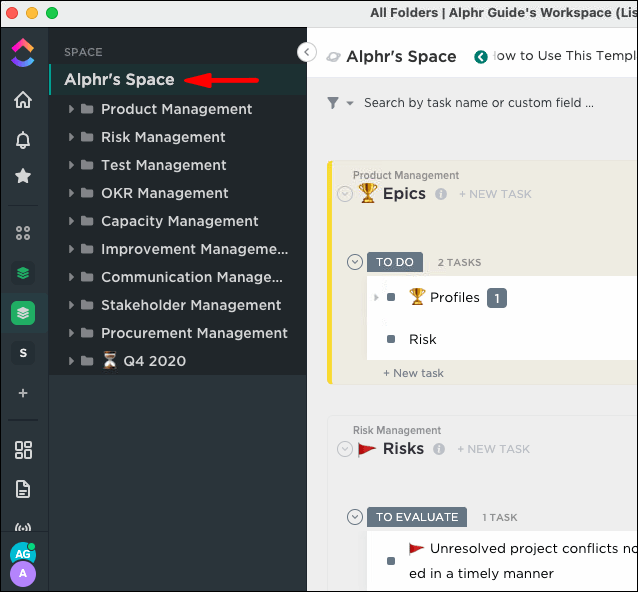
- Press the ellipses button near the space you wish to edit.

- Choose “space settings.”

- Click the “task statuses” button, followed by “add status,” and make your changes.

- Press “save,” and you’re all done.

Windows 10
Windows 10 users won’t have a hard time adding ClickUp statuses, either:
- Go to the “spaces” section in the left part of the display and hover over it to expand the bar.
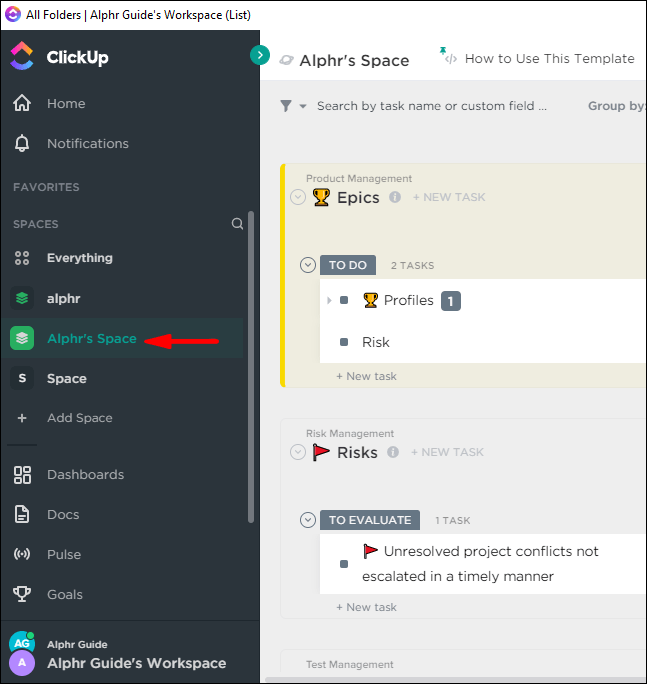
- Press the three horizontal dots beside the space you’ll be working on.

- Select the “space settings” option.

- Choose “task statuses” and “add status”.

- Make the necessary changes and click the “save” button.

Android
ClickUp’s mobile version is also user-friendly. As a result, it should only take a few seconds to add new statuses:
- Navigate to “spaces” to the left of your screen and expand the section.

- Hit the ellipses button near the space you want to modify.

- Select “space settings,” followed by “task statuses” and “add status.”
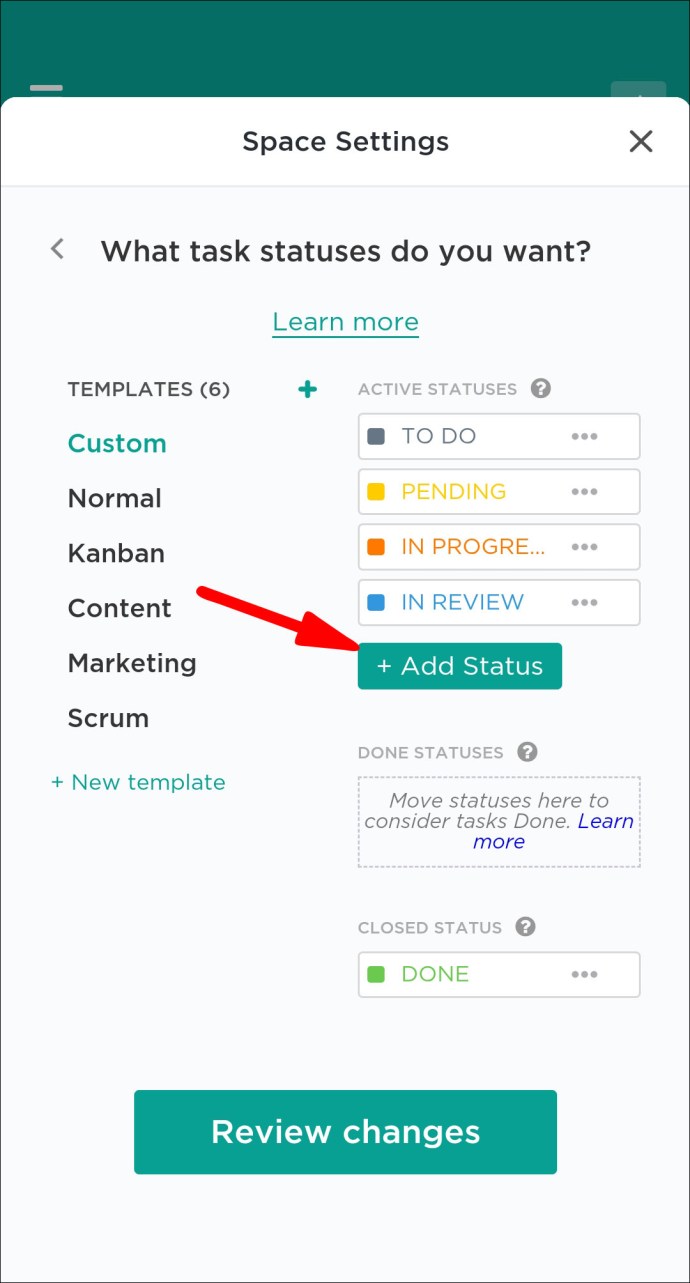
- Make your changes and press the “save” button once you’re done.

iPhone
The process is also easy on iPhones:
- Hover over your “spaces” bar in the left section of the screen and expand it.
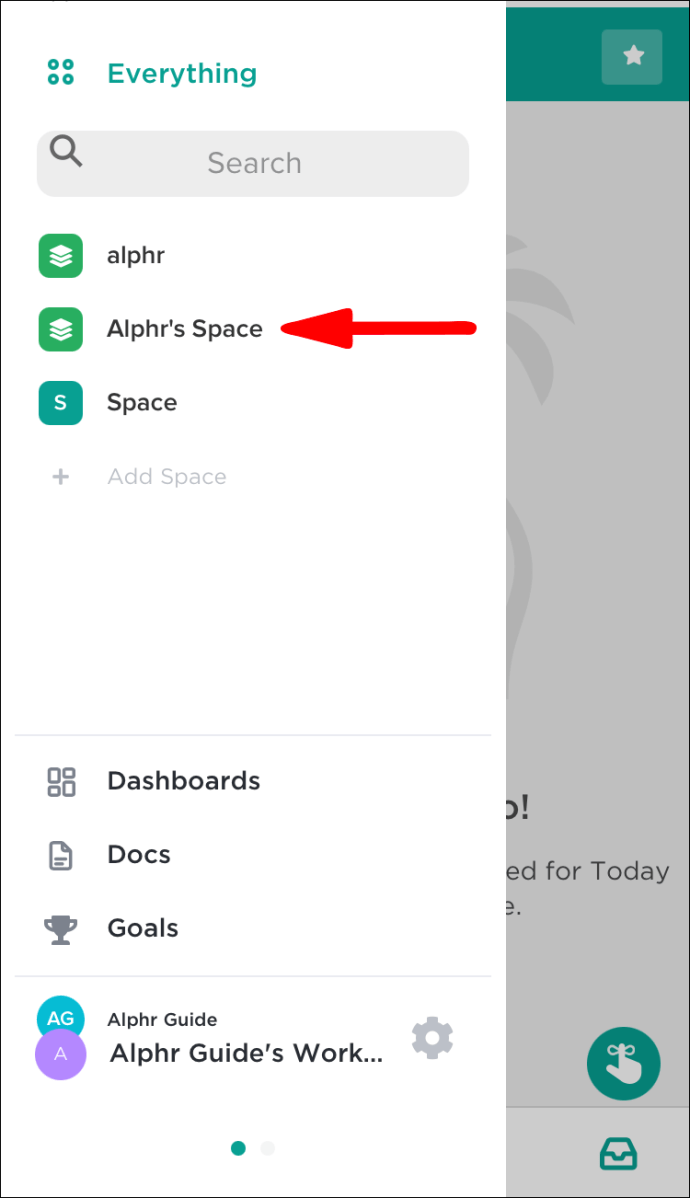
- Press the three horizontal dots alongside the space you want to edit.

- Choose “space settings” and head to “task statuses.”

- Select “add status,” make the desired adjustments, and tap “Save” to apply the changes.

How to Add Statuses to Lists?
Lists display the same statuses as their parent folder. Still, you can create separate designations for individual lists:
- Choose the list you want to modify.

- Press the three horizontal dots near the list.
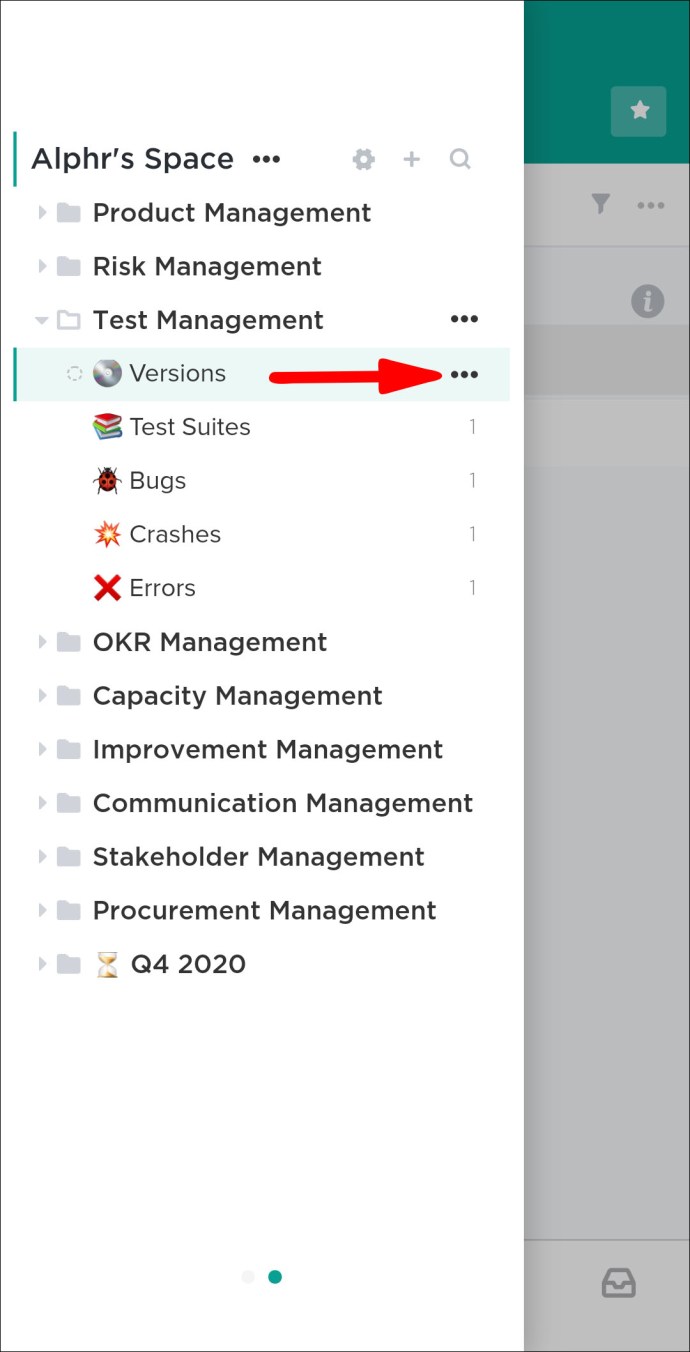
- Choose the “edit list statuses” button.
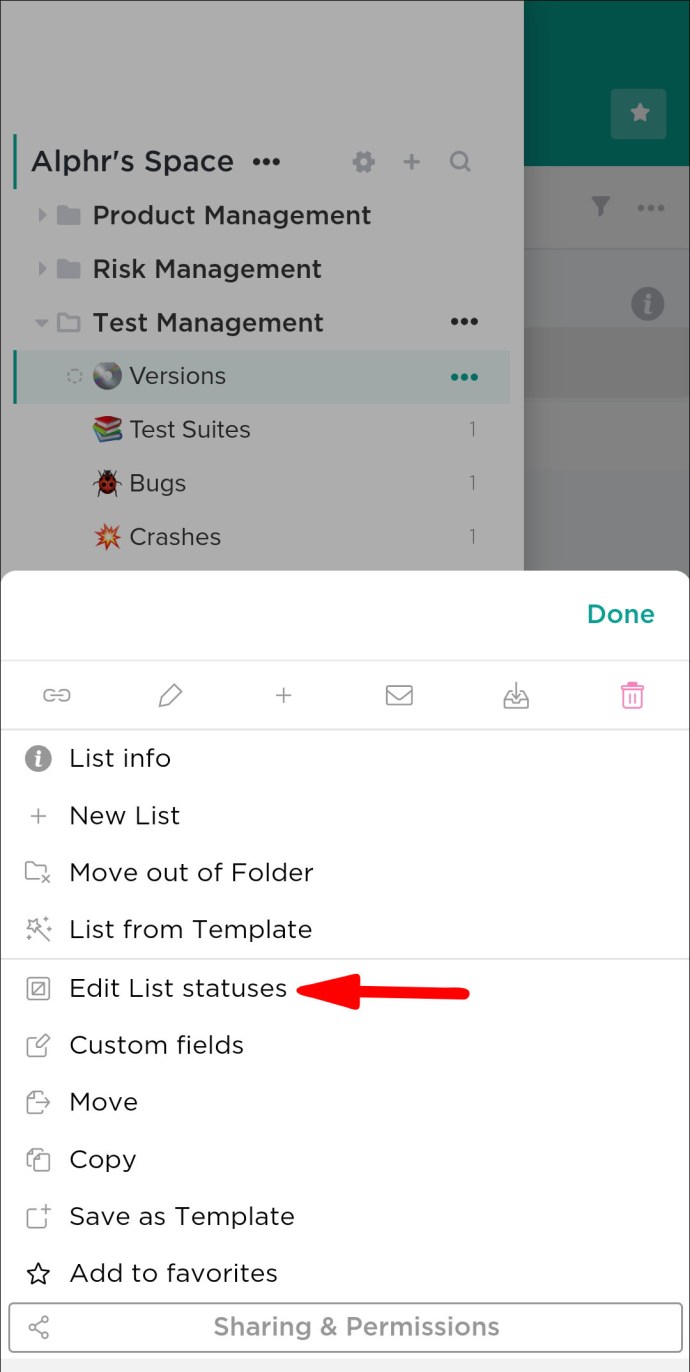
- Make your changes and press “save.”

If the list doesn’t belong to a folder, it’ll inherit the status of its parent space. If you wish to change it, repeat the steps we’ve just outlined.
How to Add Statuses to Folders?
Folder statuses work according to the same principle – they take on the same designation as the space where you place them. Thankfully, you can alter this and use your sidebar menu to add a different status:
- Go to the left sidebar and expand it.
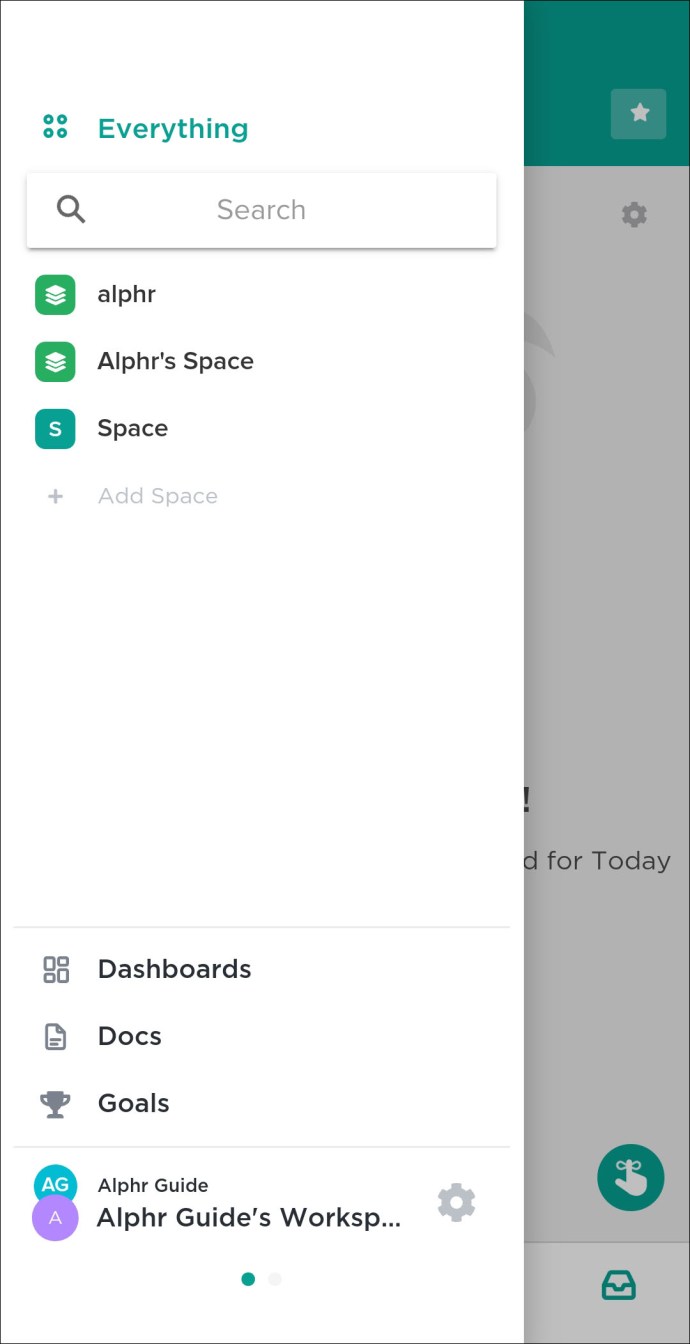
- Choose a space, and the lists and folders will expand, too.
- Press the ellipses near the folder you want to modify and head to the status section.

- Select “edit folder statuses” and make your changes.

- Hit the “save” button.

How to Add Statuses to Spaces?
ClickUp does a great job at providing easy access to customizability options. This especially comes in handy when adding statuses to spaces:
- Hover over your “spaces” section in the left part of the display to expand it.

- Choose the three horizontal lines beside the space you wish to edit.

- Select the “space settings” button, accompanied by “task statuses.”

- Go to “add status,” make any changes as you see fit, and hit “save.”

How to Edit Statuses in Board View?
ClickUp lets you edit statuses in two different views. Here’s how it works in board view:
- Choose the ellipses near your status column.
- Choose an option from the menu.
- Selecting the “rename status” button will let you edit the status name. Conversely, the “edit statuses” option allows you to change the designation of the folders or lists you’re viewing. However, this feature is only accessible if you’re working on boards whose tasks have the same status.
How to Edit Statuses in List View?
Take these steps to edit your statuses in list view:
- Press the three horizontal dots near your status.

- Select an option from the menu. By pressing “collapse group,” your status group will be hidden from the view. The “manage statuses” button enables you to change the title or color of statuses. Finally, you can click “new status” to include an additional status in the workflow.

- If you choose the final option, you’ll be asked whether you wish to add your status to the same folder.
Additional FAQs
Keep reading for some more handy details about ClickUp Statuses.
How to Mark Status as Not Done?
Marking your statuses as not done only takes a couple of clicks or taps, depending on your device:
1. Go to your status editor.
2. Find the status you want to change.
3. Click/tap on the status and relocate it to the “active statuses” section.
4. Press “save,” and you’re good to go.
How to Mark Status as Done
You may have statues you’ve completed, but you can’t close them just yet. A good idea here is to move them to the “done” section:
1. Launch your status editor.
2. Click on a status and drop it to the “done statuses” section.
3. Hit the “save” button and close the window.
Once you’ve marked your status as “done,” it’ll behave slightly differently:
· The task won’t alert you when reaching due or start dates.
· Dependencies will be unblocked.
· Tasks from your inbox and the “goals” section will be flagged as complete.
Stay on Top of Your Assignments
ClickUp statues let you organize your tasks more efficiently and keep track of their completion. Whether working from your spaces, folders, or lists, project management will become a lot easier.
Are you happy with ClickUp default statuses, or do you prefer your designations? How helpful are your statuses in terms of organizing your workspace? Let us know in the comments section below.
Original page link
Best Cool Tech Gadgets
Top favorite technology gadgets


0 comments:
Post a Comment